Diamond Daze Quilt Tutorial: A Bold and Simple Pattern for Every Quilter
The Diamond Daze Quilt is a timeless and visually striking pattern that blends geometric precision with scrap-friendly efficiency. Designed to be both approachable and impactful, this quilt uses only two shapes diamonds and triangles to create an intricate-looking but easy-to-assemble design. Whether you’re a beginner quilter looking to challenge yourself or an experienced maker wanting to use up fabric from your stash, Diamond Daze is a rewarding and flexible project.
Overview of the Diamond Daze Quilt
The Diamond Daze quilt is built around 60-degree diamonds paired with triangle units. The layout creates a dynamic visual effect that appears complex, yet the construction is surprisingly simple. This quilt pattern is ideal for using half-yard cuts or fat quarters, making it an excellent stash-busting project.
Read More Windmill Quilt
Quilt Specifications:
- Finished Size: Approximately 42.5″ x 60.5″ (lap or throw size)
- Skill Level: Confident beginner to intermediate
- Techniques Used: 60° angle cutting, basic piecing, layout alignment, quilting, and binding
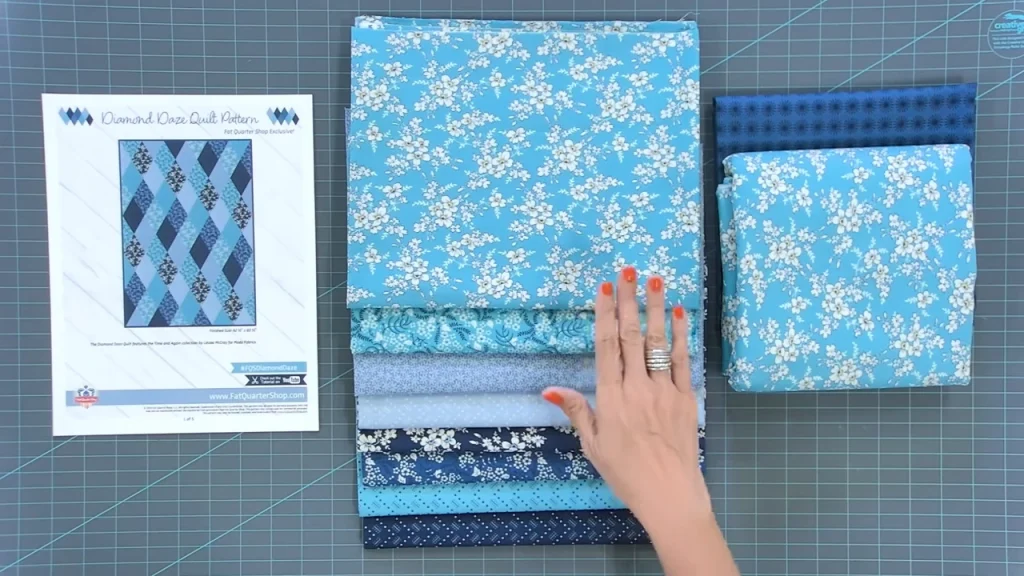
Materials Required
To begin your Diamond Daze quilt, you’ll need the following:
Read More: Easy Snowflake Day Quilt
Fabric:
- 8 half-yard cuts (or fat quarters) of your chosen prints
- 3 yards of backing fabric
- 5/8 yard of binding fabric
Tools:
- Quilting ruler with a 60° marking (6.5″ x 12.5″ recommended)
- Rotary cutter and cutting mat
- Sewing machine with ¼″ foot
- Iron and pressing mat
- Straight pins or clips
- Marking pen or pencil
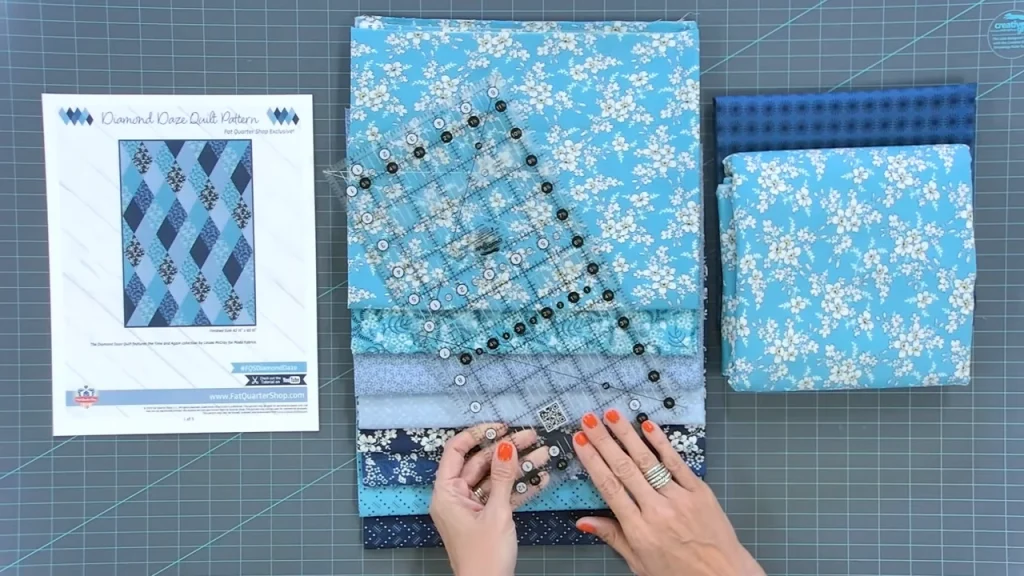
Cutting Instructions
Begin by cutting 6.5″ wide strips from each of your eight fabrics. Using a ruler with a 60° line, cut the strips into diamond shapes by aligning the angle guide and trimming both sides of the strip. The remaining fabric can be sub-cut into triangles to complete the block design.
Read More: How to Make a Rag Quilt
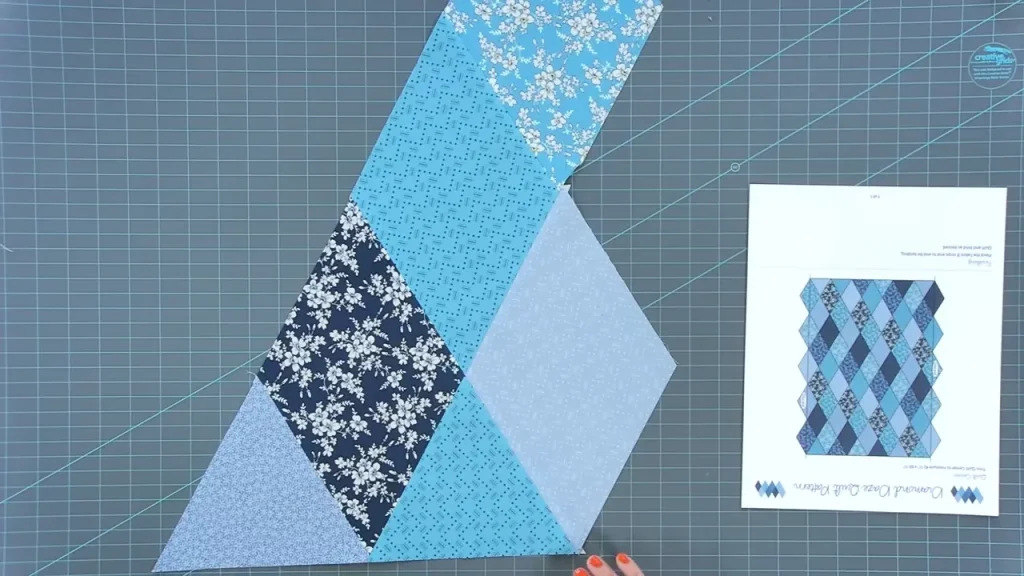
You will end up with two types of pieces:
- Diamond units
- Triangle units (from leftover ends of the strips)
Only these two shapes are required to complete the entire quilt top.
Assembling the Quilt Blocks
Step 1: Pairing Units
Match diamonds with triangle units to form a complete block. Sew using a ¼″ seam allowance and press the seams open or to one side, depending on your preference.
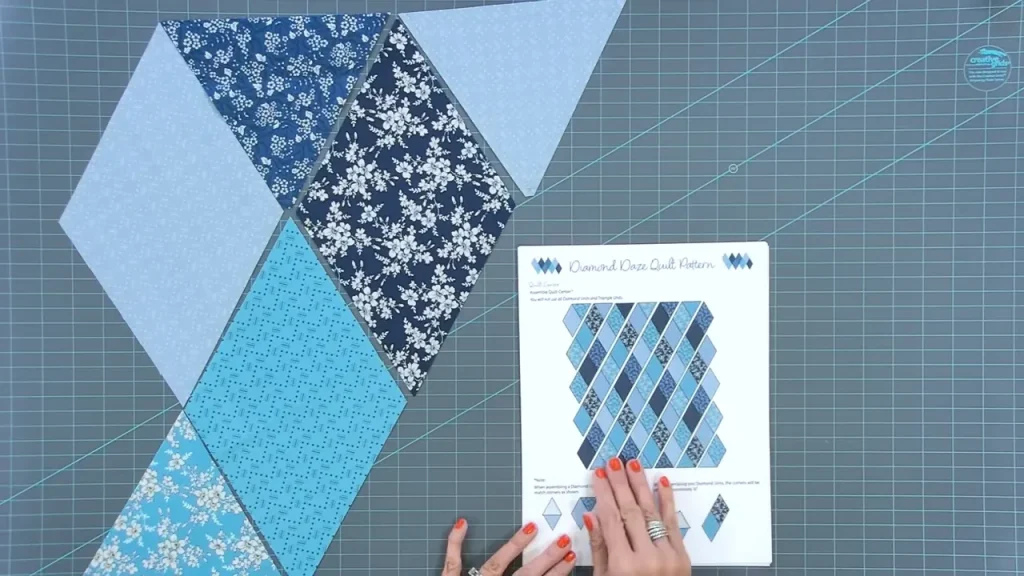
Step 2: Creating Rows
Arrange the blocks into alternating horizontal rows. The diamonds should shift from row to row, creating a cascading pattern across the quilt top.
Step 3: Joining Rows
Sew rows together carefully, matching seams and points to maintain alignment. Press all row seams consistently.
Finishing the Quilt
Once the top is assembled, follow these steps to complete your quilt:
Trimming and Borders
- Trim the edges of the quilt top to create straight, clean sides.
- Add optional borders if desired to enlarge or frame the design.
Quilting
- Layer the quilt top, batting, and backing fabric.
- Baste using pins or spray adhesive.
- Quilt as desired by machine or hand.
Binding
- Cut and prepare binding strips.
- Sew the binding around the quilt edges using your preferred technique.
Fabric Recommendations
While the tutorial features fabrics from the “Time and Again” collection by Linzee Kull McCray for Moda Fabrics, the pattern lends itself well to any coordinated bundle. Choose prints and solids with varied tones to add dimension and interest.
Final Thoughts
The Diamond Daze Quilt is a fantastic blend of simplicity and sophistication. It showcases how just two shapes diamonds and triangles can be transformed into a vibrant, structured design. This pattern is perfect for experimenting with color layouts, using leftover fabrics, or gifting a handmade creation that looks far more complex than it actually is.